
This article is brought to you by DiamondWatcher.com, the ultimate tool to compare diamond prices across retailers.
Carat (Size)
Carat measures a diamond's weight, not its physical size — one carat equals 200 milligrams. Larger diamonds are rarer, so price increases faster than weight, especially right after round-number milestones like 1.00ct, 1.50ct, and 2.00ct, where demand jumps sharply. Our Diamond Price Index tracks this "carat cliff" effect with real pricing data, updated monthly.
Relative face-up size for a well-cut round brilliant — actual size also depends on shape and cut proportions.
Two diamonds of the same shape and cut quality can look very different in size for the same carat weight if their proportions differ. Shape also matters: see Oval vs Round and Round vs Princess for how shape changes face-up size at the same carat weight.
Cut (Sparkle)
Cut refers to a diamond's proportions, symmetry, and finish — not its shape. It's the factor that most determines brilliance, fire, and sparkle, because it controls how light enters and reflects out of the stone.
Sweet spot: Very Good to Excellent. A poorly cut diamond looks dull even with top color and clarity grades.
Of the 4Cs, cut is the one we'd recommend not compromising on — a diamond with a lower cut grade can look lifeless regardless of its other grades, while a diamond with a slightly lower color or clarity grade can still look excellent in an Excellent cut.
Clarity (Flaws)
Clarity measures internal inclusions and external blemishes, graded under 10× magnification. Higher clarity means fewer visible flaws — but most grades in the middle of the scale are indistinguishable to the naked eye.
Sweet spot: VS2–SI1. See our VS1 vs VS2 and SI1 vs SI2 guides for exactly where the visible line falls.
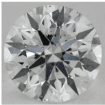
A visible inclusion under magnification — sometimes visible to the naked eye depending on size and placement.
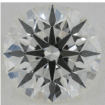
No internal flaws visible under 10× magnification — a premium grade most buyers don't need.
Color (Tint)
Color measures the absence of color — GIA grades on a scale from D (colorless) to Z (light yellow or brown). The whiter the diamond, the more light passes through cleanly, increasing brilliance.
Sweet spot: G–H. See our G vs H Color guide for when the difference actually becomes visible.

A faint yellowish tint, most noticeable in white metal settings or larger stones.
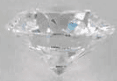
No perceptible color — the top grade, and more than most buyers need.
How They Work Together
The 4Cs interact — they're not independent decisions. A larger diamond makes inclusions and color easier to notice, which is why bigger stones often justify spending more on clarity and color. A brilliant cut shape (like round, oval, or cushion) hides both better than a step cut (like emerald or asscher), so the same clarity or color grade can look different depending on shape — see Oval vs Cushion for an example of how shape changes that math.
There's no single "correct" combination — the right balance depends on your budget and what you personally notice. Understanding how the 4Cs trade off against each other is what lets you spend your budget on the grades that actually change how the diamond looks, instead of ones that mostly just change the price.
How DiamondWatcher Helps You Compare in Practice
Once you know which combination of grades you're targeting, DiamondWatcher lets you compare actual diamonds matching those specs across every major retailer.
- Filter by carat, cut, clarity, and color to find your sweet spot
- Compare identical specs across retailers to avoid overpaying
- See real listings, not just grading theory
Explore live comparisons at https://diamondwatcher.com